Using F5 NGINX Plus Docker images with NGINX Instance Manager
Overview
This guide explains how to:
- get official NIGNX Plus Docker container images and add them to your private registry
- start the container using NGINX Agent-specific parameters
- add container instances to F5 NGINX Instance Manager
Before You Begin
Before you start, make sure that:
-
NGINX Management Suite is installed.
Note:
When installing and configuring NGINX Management Suite, remember the domain name/IP address and the gRPC port number. You will need it to configure the NGINX Agent to communicate with NGINX Instance Manager. -
JSON Web Token (JWT) or nginx-repo.crt and nginx-repo.key files downloaded from MyF5 Customer Portal
-
Docker Engine command-line tool installed
-
your Private Docker Registry is configured and running
About NGINX Plus Docker Registry
NGINX Plus Docker registry is available at https://private-registry.nginx.com/v2/. It contains the following Docker container images:
-
NGINX Plus:
https://private-registry.nginx.com/v2/nginx-plus/base -
Unprivileged installation of NGINX Plus:
https://private-registry.nginx.com/v2/nginx-plus/rootless-base -
NGINX Plus bundled with NGINX Agent:
https://private-registry.nginx.com/v2/nginx-plus/agent -
Unprivileged installation of NGINX Plus and NGINX Agent:
https://private-registry.nginx.com/v2/nginx-plus/rootless-agent
The images can be targeted for a particular operating system and NGINX Plus release using tags.
Tags for Operating Systems
| Operating system | Basic OS tag | Tag examples |
|---|---|---|
| Alpine (x86_64, aarch64) | alpine |
r32-alpine, r32-alpine-3.20 |
| Debian (x86_64, aarch64) | debian |
r32-debian, r32-debian-bookworm |
| Red Hat Enterprise Linux (x86_64, aarch64) | ubi |
r32-ubi, r32-ubi-9, r32-ubi-9-20240624 |
Tags for NGINX Plus Versions
The NGINX Plus registry contains images for the two most recent versions of NGINX Plus. The basic Operating System tag returns the latest version of NGINX Plus built for the latest version of this operating system.
Example:
nginx-plus-r32-ubi-9,nginx-plus-r31-alpine-3.19.
Listing All Tags
For a complete tag list for NGINX Plus bundled with NGINX Agent images, use the command:
curl https://private-registry.nginx.com/v2/nginx-plus/<nginxplus-image-type>/tags/list --key <nginx-repo.key> --cert <nginx-repo.crt> | jq
where:
- the
<nginxplus-image-type>is the location of images in NGINX Plus private registry:base,rootless-base,agent,rootless-agent - the
<nginx-repo.key>is a local path to your client key from MyF5, for example,/etc/ssl/nginx/nginx-repo-x12345.key - the
<nginx-repo.crt>is a local path to your client certificate from MyF5, for example,/etc/ssl/nginx/nginx-repo-x12345.crt - the
jqcommand is used to format the JSON output for easier reading and requires the jq JSON processor to be installed.
Getting an Image From The Registry
-
Log in to the NGINX Plus registry. Replace
YOUR_JWT_HEREwith your actual JWT obtained from MyF5:sudo docker login private-registry.nginx.com --username=YOUR_JWT_HERE --password=none -
Pull the NGINX Plus image from the private registry. Use NGINX Plus bundled with NGINX Agent image (the
agentsubdirectory) to enable connectivity with NGINX Instance Manager. ReplaceVERSION_TAGwith the specific version tag you need.sudo docker pull private-registry.nginx.com/nginx-plus/agent:VERSION_TAG
Example:
To pull the latest version of NGINX Plus with NGINX Agent image for Debian or Ubuntu, use the command:
sudo docker pull private-registry.nginx.com/nginx-plus/agent:debian
Adding Image To Private Docker Registry
After pulling the image, tag it and upload it to your private registry.
-
Log in to your private registry:
docker login <my-docker-registry> -
Tag the image. Replace
<my-docker-registry>with your registry’s path and<my-version-tag>with the your NGINX Plus version, OS version, or both:docker tag private-registry.nginx.com/nginx-plus/agent:<version-tag> <my-docker-registry>/nginx-plus/agent:<my-version-tag> -
Push the image to the private registry and tag it:
docker push <my-docker-registry>/nginx-plus/agent:<my-version-tag>
Launching Docker Container
Start the Docker container from your private registry. You will also need to pass NGINX Agent connection settings as environment variables (--env=$variable) to enable connectivity with NGINX Instance Manager:
sudo docker run \
--env=NGINX_AGENT_SERVER_GRPCPORT=443 \
--env=NGINX_AGENT_SERVER_HOST=127.0.0.1 \
--env=NGINX_AGENT_TLS_ENABLE=true \
--env=NGINX_AGENT_TLS_SKIP_VERIFY=false \
--restart=always \
--runtime=runc \
-d <my-docker-registry>/nginx-plus/agent:<my-version-tag>
where:
NGINX_AGENT_SERVER_GRPCPORTsets a GRPC port used by NGINX Agent to communicate with NGINX Instance Manager.NGINX_AGENT_SERVER_HOSTsets the domain name or IP address of NGINX Instance Manager. Note that for production environments it is not recommended to expose NGINX Instance Manager to public networks.NGINX_AGENT_TLS_ENABLEandNGINX_AGENT_TLS_SKIP_VERIFYenable mutual TLS, server-side TLS, or insecure mode (not recommended for production environments). See Encrypt communication for details.<my-docker-registry>is the path to your private registry.<my-version-tag>is the tag assigned when pushing to your registry.
Full list of CLI flags with their default values can be found in CLI Flags and Environment Variables.
Connecting NGINX Plus From Container to NGINX Instance Manager
-
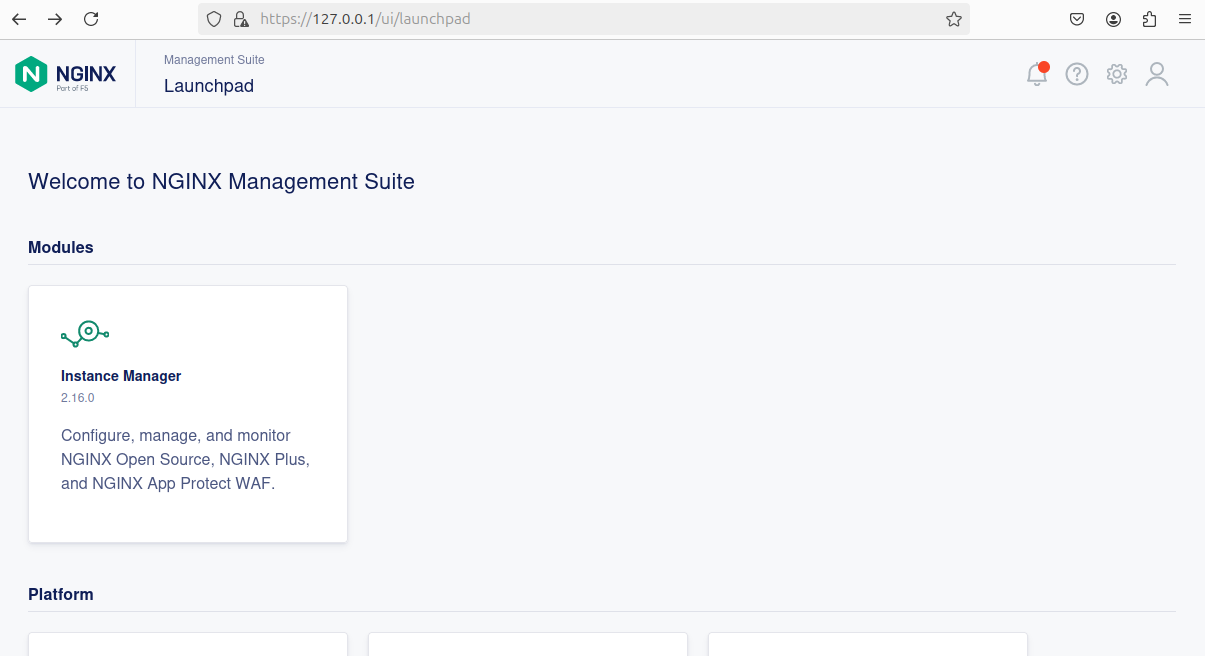
In a web browser, enter the address for your NGINX Management Suite, for example,
https://127.0.0.1/ui/, and log in. -
In the
Modulessection, selectInstance Manager:
-
Search for live hosts with NGINX Open Source or NGINX Plus.
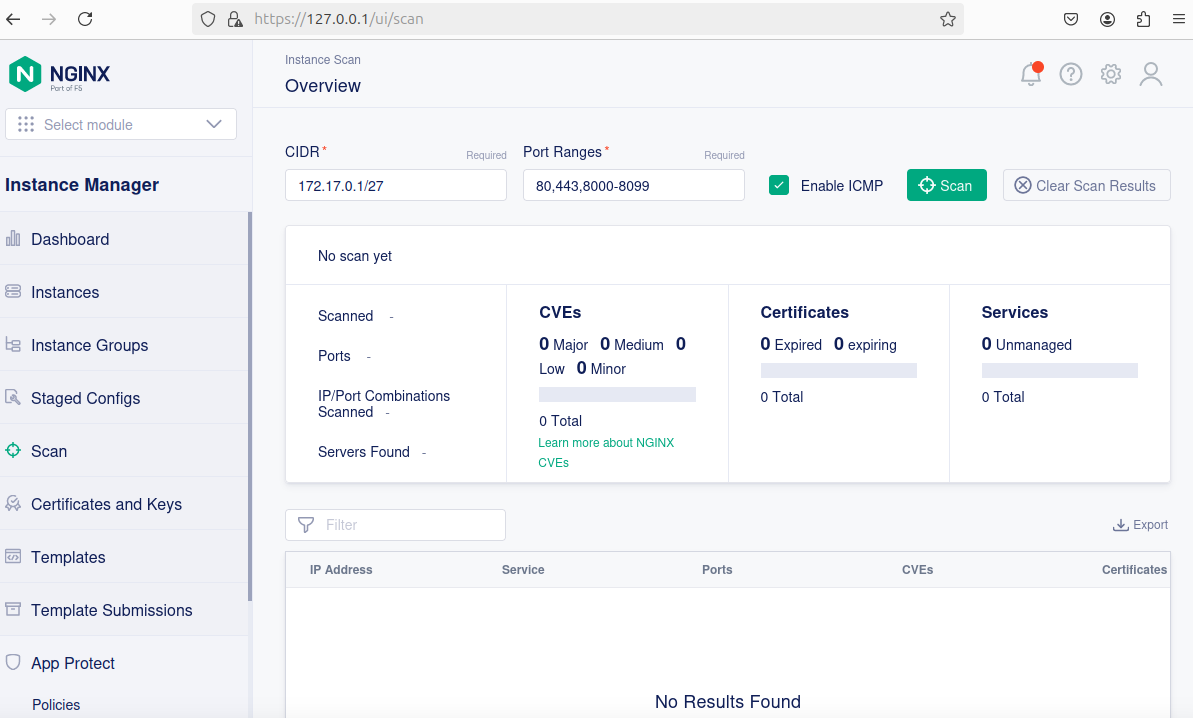
- In the left menu, Select
Scan. - In the
CIDRfield, specify the mask of the target network, for example,172.17.0.1/27. - In the
Port Rangesfield, specify one or more ports or port ranges separated by a comma, for example,80,443,8000-8090. - Deselect the
ICMPcheckbox if Internet Control Message Protocol (ICMP) echo requests are disabled in your network. - Select
Scan.
- In the left menu, Select
- When the scanning is finished, you will get the list of your NGINX Plus managed and unmanaged instances, including instances running in containers:
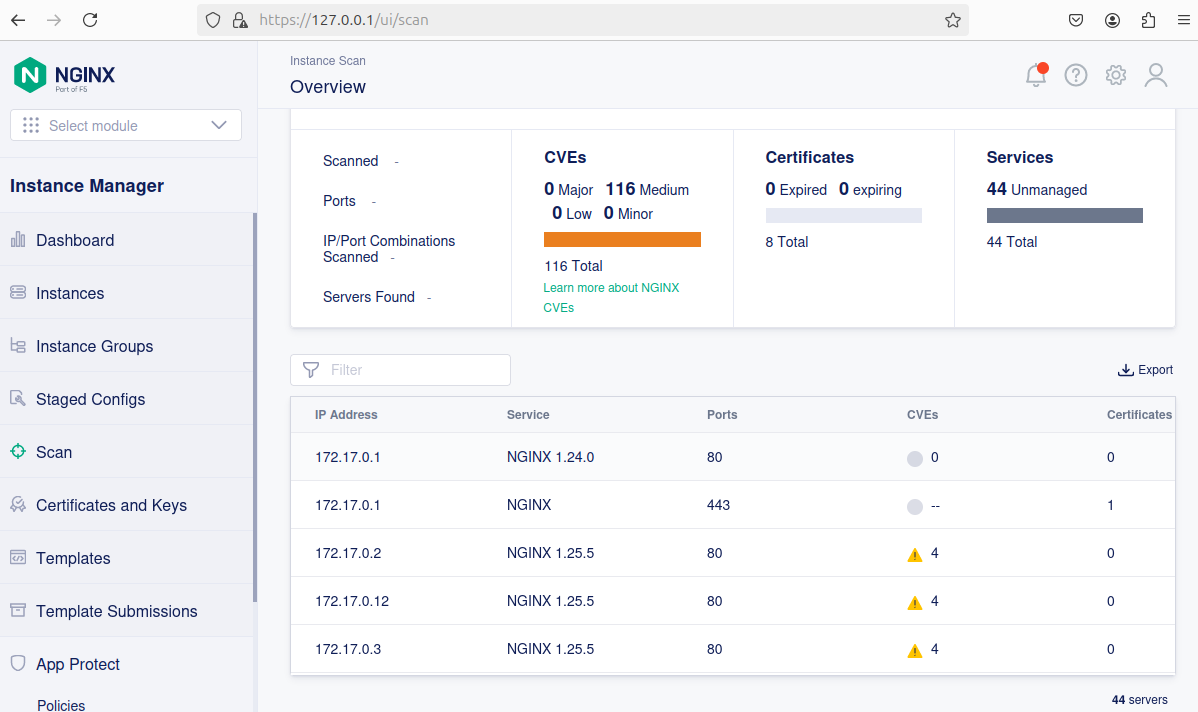
NGINX Plus instances that can be managed by NGINX Instance Manager can be accessed from the NGINX Plus tab.
Troubleshooting unmanaged instances
If the instance appears as “unmanaged”, check if:
- the NGINX Plus Docker image includes NGINX Agent
- the container was started with correct
--env=parameters of NGINX Agent, for example,--env=NGINX_AGENT_SERVER_GRPCPORT=443- there are connectivity issues between NGINX Management Suite and the network running NGINX Plus instances (for example, ports
80and443are open in the firewall)
You can also scan for NGINX instances using the NGINX Instance Manager API; for more information, refer to Scan NGINX Instances.