End of Sale Notice:
F5 NGINX is announcing the End of Sale (EoS) for NGINX Management Suite API Connectivity Manager Module, effective January 1, 2024.
F5 maintains generous lifecycle policies that allow customers to continue support and receive product updates. Existing API Connectivity Manager Module customers can continue to use the product past the EoS date. License renewals are not available after September 30, 2024.
See our End of Sale announcement for more details.
Set Up RBAC for Infra Admins
Learn how to set up role-based access control (RBAC) for Infra Admins using the built-in and custom roles available in the NGINX Management Suite API Connectivity Manager.
Overview
This tutorial will show you how to use the Role-Based Access Control (RBAC) features of API Connectivity Manager to give Infra Admins tailored levels of access to features in NGINX Management Suite. You will learn how to create roles to grant users access to workspaces and features, as well as how to add and assign users to those roles.
Intended Audience
This guide is meant for NGINX Management Suite Administrators who can add users and create and assign roles.
What is RBAC?
RBAC (Role-Based Access Control) is a security framework that provides access control based on roles assigned to users or user groups. This framework defines the roles and responsibilities of users within the system and restricts access to resources according to the user’s role. RBAC ensures only authorized users have access to specific resources and prevents unauthorized access.
Use Case
Jon Manzana, who recently joined Acme Co., is a Senior Infrastructure Administrator for the Product Development business unit. Jon installs and maintains the IT infrastructure, monitors system performance and troubleshoots issues, and implements and maintains the IT policies and procedures.
In the following example, Jon is added to the “ACM Infra Admin” role and granted CRUD (Create, Read, Update, and Delete) access to the “product-development” workspace.
Workflow
In the steps that follow, we will:
- Create a role that gives members access to an Infrastructure workspace,
- Add a new user,
- Add the user to an Infrastructure workspace and the “ACM Infra Admin” role.
Before You Begin
To complete the instructions in this guide, you need the following:
- API Connectivity Manager is installed, licensed, and running
- One or more Infrastructure workspaces
Built-In Role
API Connectivity Manager comes pre-configured with an “ACM Infra Admin” role suitable for Infrastructure Admins.
- Infrastructure Admin: Infrastructure Administrators ensure uniform governance across an organization’s infrastructure by setting policies at the infrastructure level, enabling teams to build APIs without interruption while adhering to the organization’s standards.
ACM Infra Admin
The built-in “ACM Infra Admin” role grants access to the following features at the workspace level. You can customize these settings if you wish.
| Feature | Access | Scope | Description |
|---|---|---|---|
| Dev Portal Setup | Create, Read, Update, Delete | Workspace | Set up and manage Dev Portals. |
| Environments | Create, Read, Update, Delete | Workspace | Create, configure, and manage environments. |
| Proxy Clusters | Create, Read, Update, Delete | Workspace | Create, configure, and manage proxy clusters. |
| Proxy Config | Read | Workspace | Create and manage proxies. |
| Service Workspace | Read | Workspace | Customize and manage Service workspaces. |
Create Custom Roles
In addition to the built-in ACM RBAC roles, you can create custom roles to give users tailored levels of access to workspaces and features.
Example: Create a workspace role
In the following example, we’ll create a role for the “product-development” workspace. This role will let members have READ access that workspace by default. Afterward, in the next section, we’ll add a user and assign him the built-in “ACM Infra Admin” role. This will provide additional permissions to the workspace.
To create an Infrastructure workspace role:
-
In a web browser, go to the FQDN for your NGINX Management Suite host and log in.
-
Select the Settings (gear) icon in the upper-right corner.
-
From the left navigation menu, select Roles.
-
Select Create.
-
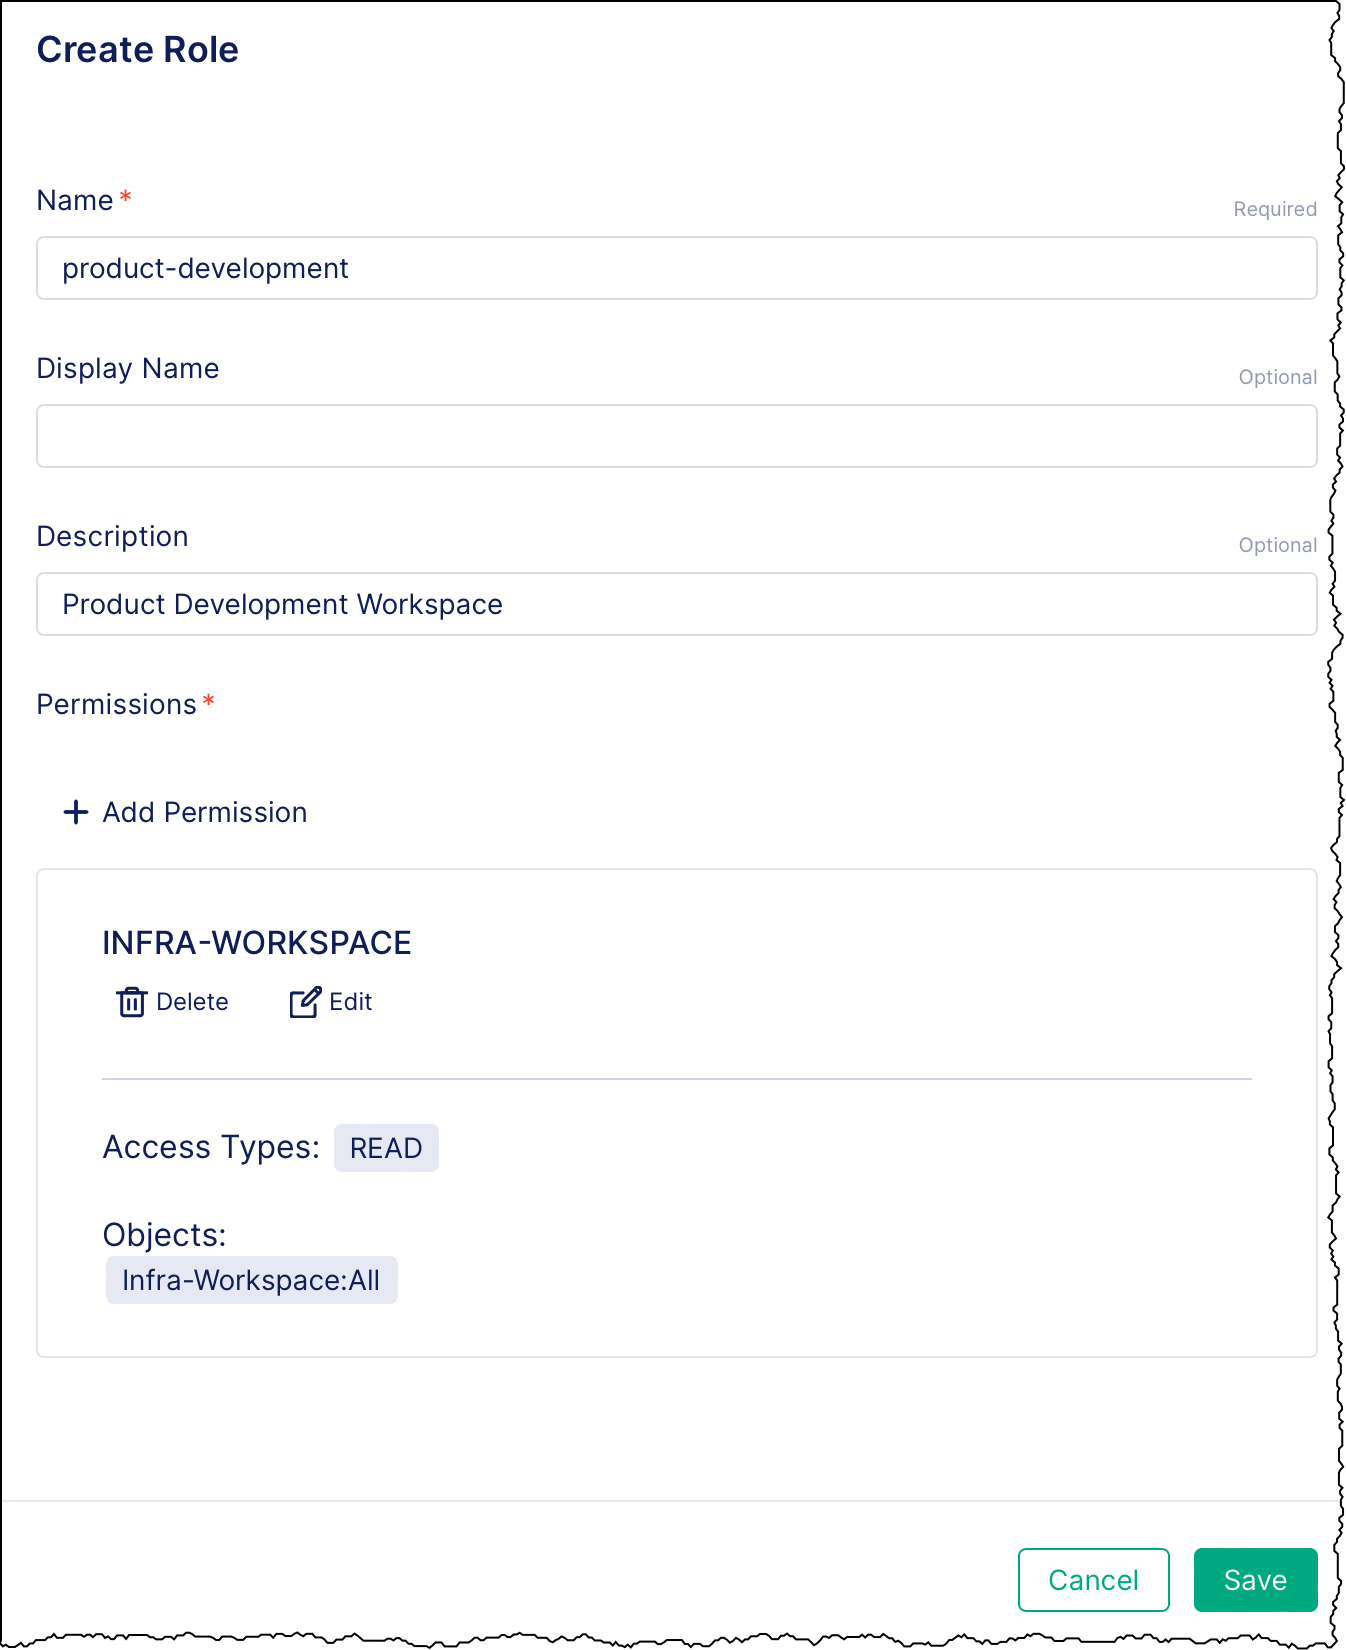
On the Create Role form, provide the following details:
- Name: The name to use for the role. In this example, we’ll name the role “product-development”.
- Display name: An optional, user-friendly name to show for the role.
- Description: An optional, brief summary of what the role is.
-
To add permissions:
-
Select Add Permission.
-
From the Module list, select API Connectivity Manager.
-
In the Feature list, select, select Infra Workspace.
-
Select Add Additional Access to add a CRUD (Create, Read, Update, Delete) access level.
- In the Access list, select the access level(s) you want to grant. In this example, we’ll select
READ. - In the Applies to list, select Infra-Workspace.
- In the Select values list, select the workspace you want to apply the access to. In this example, we’ll select, “product-development”.
- In the Access list, select the access level(s) you want to grant. In this example, we’ll select
-
Select Save.
-
-
Select Save.
Add Users
When adding users, you can assign them to roles to give them specific access. Role-based access is cumulative, meaning that if a user is given READ access for a feature in one role and CRUD access in another, they will have CRUD access for that feature.
In the following example, we’ll create a user named Jon Manzana. We’ll add Jon to the “production-workspace” role we created above, granting him READ access to that workspace. Since Jon works as an Infrastructure Admin, we’ll assign him the pre-configured ACM Infra Admin role, too. This will give Jon CRUD access to any workspace he’s assigned to. By having both the “production-workspace” and “ACM Infra Admin” roles, Jon will get CRUD access to the “product-development” workspace.
To add a user to NGINX Management Suite:
-
In a web browser, go to the FQDN for your NGINX Management Suite host and log in.
-
Select the Settings (gear) icon in the upper-right corner.
-
On the left menu, select Users.
-
Select Create.
-
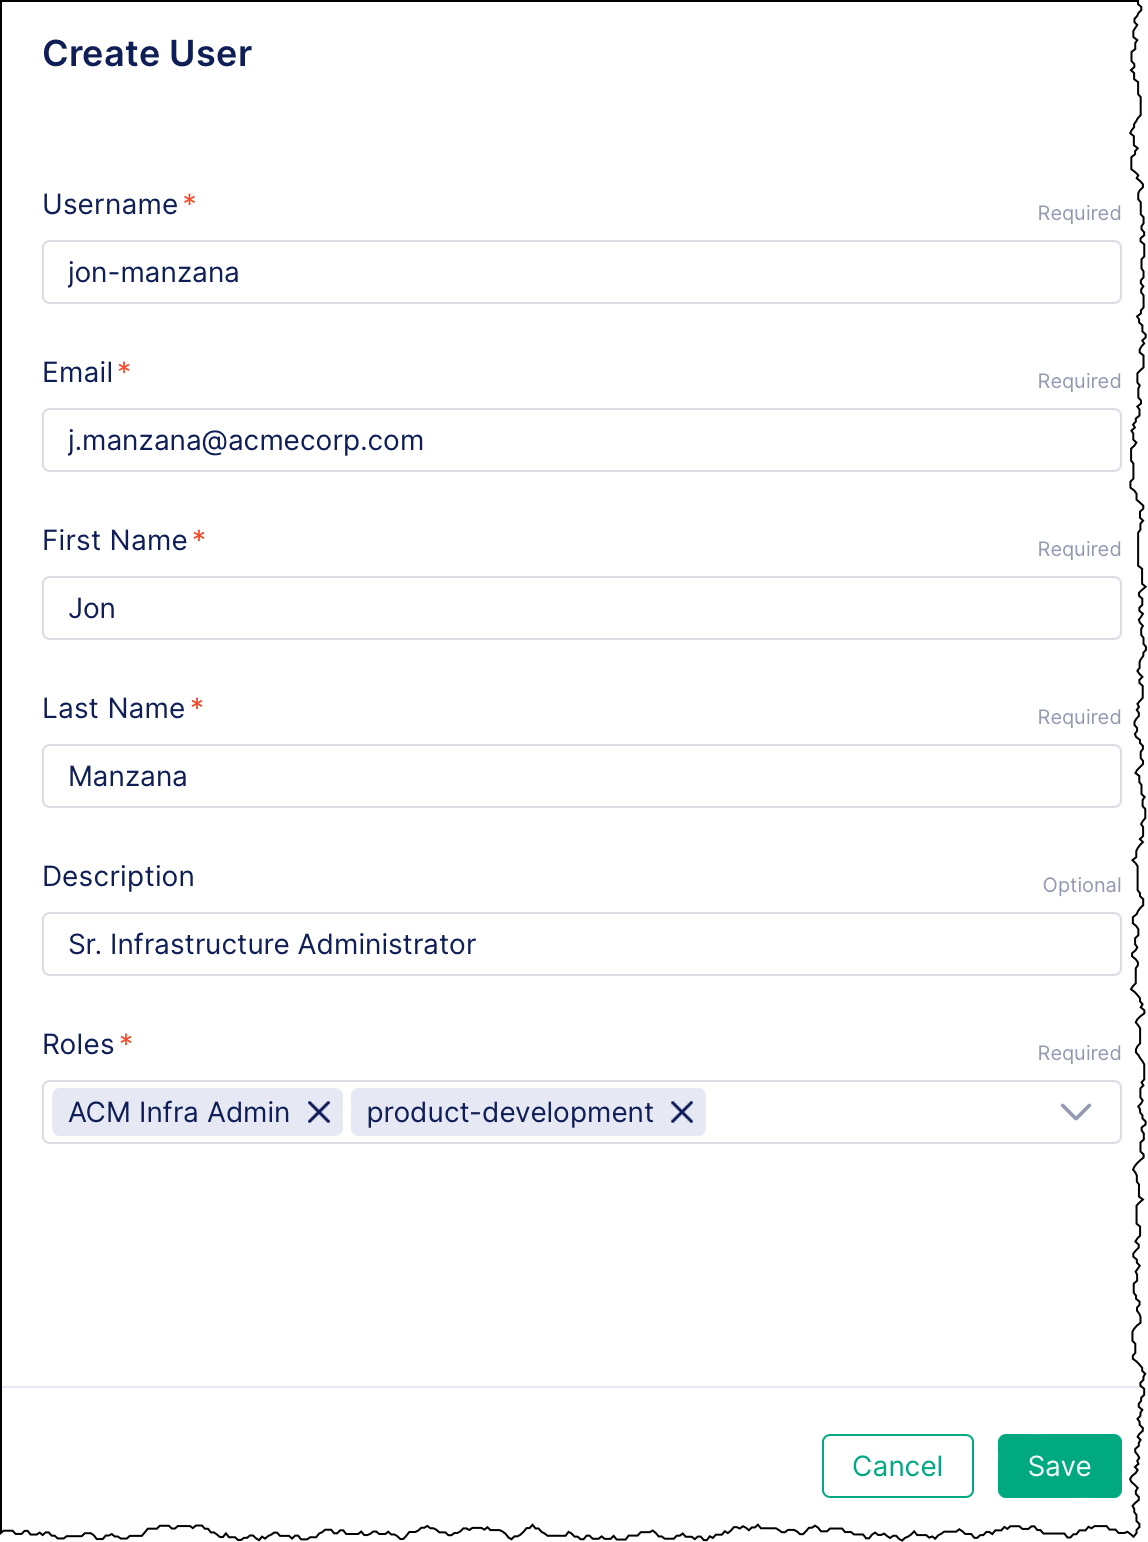
On the Create User form, enter the details for the user:
- Username: A unique name to identify the user. For example, “jon-manzana”.
- Email: The user’s email address. For example, “j.manzana@acmecorp.com”.
- First Name: The user’s first name. For example, “Jon”.
- Last Name: The user’s last name. For example, “Manzana”.
- Description: An optional brief description of the user. For example, “Sr. Infrastructure Administrator”.
-
In the Roles list, select one or more roles to assign to the user.
For example, for our imaginary new hire Jon Manzana, select the built-in
ACM Infra Adminrole to give him those default permissions. Then select the “product-development” role to assign him to that workspace. Because role-based access is cumulative, Jon, as an ACM Infra Admin, is grantedCRUDaccess for the Dev Portal Setup and Environments features in the “product-development” workspace, rather than theREADaccess that’s assigned to members of “product-development” by default. -
Select Save.