Set up a round-robin reverse proxy with an augment template
Overview
This tutorial guides you through setting up a round-robin reverse proxy using base and augment templates in NGINX Instance Manager. It’s intended for network administrators and developers familiar with basic NGINX configurations.
Using templates, especially augment templates, provides significant advantages. Augment templates allow you to modify and extend configurations without altering the base template, making it easier to manage and update settings. This approach enhances modularity, enabling specific teams to control parts of the configuration while maintaining overall system integrity. For instance, using an augment template for round-robin reverse proxy settings allows you to efficiently distribute incoming traffic across multiple servers, enhancing load balancing and reliability. Role-Based Access Control (RBAC) for templates and template submissions ensures that only authorized users can make changes, promoting security and efficiency. This means that while administrators can manage the base configuration, development teams can independently manage specific proxy settings, improving collaboration and streamlining operations.
By the end, you’ll be able to:
- Create and configure a base template.
- Create and configure an augment template to extend the functionality of the base template.
- Deploy these templates to manage traffic efficiently within your NGINX environment.
Background
F5 NGINX Instance Manager simplifies the management of NGINX configurations across a wide network. Using templates, administrators can ensure consistent configurations while easily customizing individual settings with augment templates.
Before you start
Before you start the tutorial, you should:
- Install NGINX Instance Manager 2.16 or later. If you’re using an earlier version, you’ll need to upgrade to access the features needed for this tutorial.
- Have administrative access to NGINX Instance Manager.
- Understand basic concepts of web servers and reverse proxies.
- Have basic knowledge of Go templates, JSON schema, and the NGINX configuration syntax.
Create the base template
In this section, you’ll learn how to create a base config template.
- Open your web browser, go to the Fully Qualified Domain Name (FQDN) of your NGINX Management Suite host, and log in.
- From the Launchpad menu, choose Instance Manager.
- On the left menu, select Templates.
- Select Create.
- Select New.
- Give the template a name. For this tutorial, we’ll call the base template rr_base_template.
- Optionally, provide a description for the template. (For example, Round-Robin Base Template)
- Select Draft for the template status.
- Select Base for the template type.
- Select Submit.
Add the base template files
Here, you’ll add the necessary Go template and JSON schema files to your base template.
- On the Template > Overview page, select rr_base_template.
- Add the config template file:
- Select Add File.
- Select Config File, then select base.tmpl.
- Select Add.
- Add the schema files:
- Select Add File.
- Select Schema File, then select each of the following: http-server.json, http-upstream, and location.json.
- Select Add.
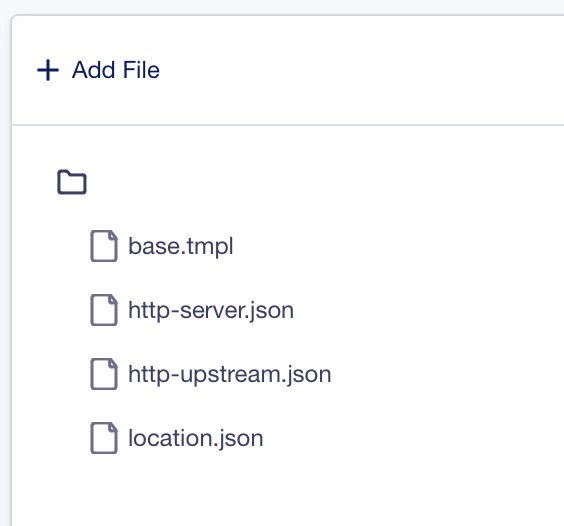
Your base template should now include the following files:
Add the base.tmpl file details
This snippet defines the structure of the final NGINX configuration file. It uses Go’s text/template module to dynamically add input into the NGINX configuration. You can identify where augment templates will be inserted by looking for lines like:
Augment template injection point
{{ $input.ExecTemplateAugments "main" }}
The word “main” can be replaced with other augment injection points, such as “http-server” or “http-upstream.”
- In the template file list, select base.tmpl.
- Copy and paste the following Go template into the base.tmpl file editor.
- Select Save (disk icon).
{{/*
    A simple base template that provides augment injection points for
    the main context, the http context, upstreams, servers, and locations.
*/}}
{{ $input := .}}
{{ $baseData := .Data.V1}}

{{/* Inject augments targeting the main context here */}}
{{ $input.ExecTemplateAugments "main" }}
events {
    worker_connections  1024;
}

http {
    {{/* Inject augments targeting the http context here */}}
    {{ $input.ExecTemplateAugments "http" }}
    {{ range $upstreamIndex, $upstream := $baseData.http.upstreams }}
          upstream {{$upstream.templateInput.nameInConfig}} {
              {{$upstreamTemplateInput := $upstream.templateInput}}
              {{range $serverIndex, $upstreamServer := $upstreamTemplateInput.servers}}
                  {{$port := ""}}
                  {{if $upstreamServer.port}}
                      {{$port = (printf ":%0.f" $upstreamServer.port)}}
                  {{end}}
                  server {{$upstreamServer.address}}{{$port}};
              {{end}}

              {{/* Inject augments targeting this $upstream here */}}
              {{ $input.ExecTemplateAugments "http-upstream" $upstream }}
          }
    {{end}}

    {{ range $serverIndex, $server := $baseData.http.servers}}
        server {
            server_name {{$server.templateInput.serverNameInConfig}};
            {{ range $locationIndex, $location := $server.locations}}
                location {{$location.templateInput.locationMatchExpression}} {
                  {{/* Inject augments targeting this $location here */}}
                  {{ $input.ExecTemplateAugments "location" $location $server }}
                }
            {{end}}

            {{/* Inject augments targeting this $server here */}}
            {{ $input.ExecTemplateAugments "http-server" $server }}
        }
    {{end}}
}
Add the http-server.json file details
This snippet uses the JSON Schema specification to define fields for generating a user interface and serving as the data structure for inputs injected into the template.
To understand how this template connects to the base template you just added, look for the serverNameInConfig reference in the code. This reference links the JSON schema fields to the configuration settings defined in the base template.
- Select http-server.json.
- Copy and paste the following JSON schema into the http-server.json file editor.
- Select Save (disk icon).
{
  "$schema": "https://json-schema.org/draft/2020-12/schema",
  "title": "HTTP Servers",
  "type": "object",
  "properties": {
    "templateInput": {
      "type": [
        "object",
        "null"
      ],
      "properties": {
        "serverName": {
          "title": "Server Label",
          "type": "string",
          "description": "Enter a unique label for the server. This label is displayed in the user interface and acts as a key for matching and applying augment input to the specific server.",
          "examples": [
            "Example Server"
          ]
        },
        "serverNameInConfig": {
          "title": "Name",
          "type": "string",
          "description": "The name of the HTTP server. This value is used when matching incoming requests to the correct server.",
          "examples": [
            "example.com"
          ]
        }
      },
      "required": [
        "serverName",
        "serverNameInConfig"
      ]
    }
  },
  "required": []
}
Add the http-upstream.json file details
- Select http-upstream.json.
- Copy and paste the following JSON schema into the http-upstream.json file editor.
- Select Save (disk icon).
{
  "$schema": "https://json-schema.org/draft/2020-12/schema",
  "title": "HTTP Upstreams",
  "type": "object",
  "properties": {
    "templateInput": {
      "type": [
        "object",
        "null"
      ],
      "properties": {
        "name": {
          "title": "Upstream Label",
          "type": "string",
          "description": "Enter a unique label for the upstream. This label is displayed in the user interface and acts as a key for matching and applying augment input to the specific upstream.",
          "examples": [
            "Users Service"
          ]
        },
        "nameInConfig": {
          "title": "Name",
          "type": "string",

          "examples": [
            "users_backend"
          ]
        },
        "servers": {
          "type": "array",
          "title": "Upstream Servers",
          "items": {
            "type": "object",
            "properties": {
              "address": {
                "title": "Upstream server address",
                "type": "string",
                "description": "Specifies the address for the upstream server.",
                "examples": [
                  "users1.example.com",
                  "192.0.0.1"
                ]
              },
              "port": {
                "type": "integer",
                "title": "Port",
                "description": "Specifies the port for the upstream server.",
                "minimum": 1,
                "maximum": 65535,
                "examples": [
                  80
                ]
              }
            },
            "required": [
              "address"
            ]
          }
        }
      },
      "required": [
        "name",
        "servers",
        "nameInConfig"
      ]
    }
  },
  "required": []
}
Add the location.json file details
The schema defined in location.json is used to create a user interface for defining multiple location blocks. To understand how this works with the template data, look at the base.tmpl file and find the section that begins with:
{{ range $locationIndex, $location := $server.locations}}
Since only one augment will be defined, it’s important to link the input from the augment template to a specific location block among the many defined by the user. Duplicate location blocks are generally not useful. To achieve this, the nameExpression field in this schema serves as the key element, connecting the content from the augment template to a specific location block. You will see this used in the location.tmpl file of the augment template in a later step.
- Select location.json.
- Copy and paste the following JSON schema into the location.json file editor.
- Select Save (disk icon).
{
 "$schema": "https://json-schema.org/draft/2020-12/schema",
 "title": "Locations",
 "type": "object",
 "properties": {
   "templateInput": {
     "type": [
       "object",
       "null"
     ],
     "properties": {
        "nameExpression": {
          "title": "Location Label",
          "type": "string",
          "description": "Enter a unique label for the location. This label is displayed in the user interface and acts as a key for matching and applying augment input to the specific location.",
          "examples": [
            "Users Endpoint"
          ]
        },
       "locationMatchExpression": {
         "title": "Match Expression",
         "type": "string",
         "description": "The prefix to match request paths by.",
         "examples": [
           "/users"
         ]
       }
     },
     "required": [
       "nameExpression",
       "locationMatchExpression"
     ]
   }
 },
 "required": []
}
Create the augment template
This section shows how to create an augment template that specifies additional configuration details not covered by the base template.
To create the augment template, take the following steps:
- On the Templates > Overview page, select Create.
- Select New.
- Give the template a name. For this tutorial, we’ll call the augment template rr_aug_loc_proxy.
- Optionally, provide a description for the template. For example, Round-Robin Location Proxy Augment.
- Select Draft for the template status.
- Select Augment for the template type.
- Select Submit.
Add the augment template files
Here, you’ll add the necessary Go template and JSON schema files to your augment template.
- On the Template > Overview page, select rr_aug_loc_proxy.
- Add the config template file:
- Select Add File.
- Select Config File, then select location.tmpl.
- Select Add.
- Add the schema files:
- Select Add File.
- Select Schema File, then select location.json.
- Select Add.
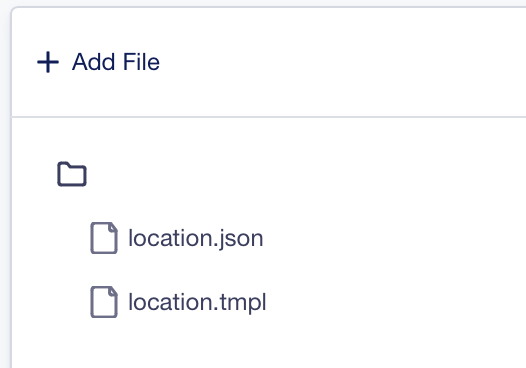
Your augment template should now include the following files:
Add the location.tmpl details
This template determines which location block—among those defined by the template user in the NGINX Instance Manager web interface—should receive the specific configuration content. The essential part of the template that will appear in the final NGINX configuration is the line:
proxy_pass http://{{ $arguments.upstreamName }};
The first part of the template checks the location’s label, nameExpression, and matches it with the data provided by the user to the augment template. It then assigns this data to $arguments, which is used to generate the final configuration snippet. This snippet is then injected only into the targeted location block.
- Select location.tmpl.
- Copy and paste the following contents into the location.tmpl file editor.
- Select Save (disk icon).
{{ $augmentData := .AugmentData.V1 }}
{{ $server := index .Args 1 }}
{{ $location := index .Args 0 }}
{{ $arguments := dict }}

{{/* Get the location label from the base template */}}
{{ $locationLabel := $location.templateInput.nameExpression | trim | lower }}

{{/* Check if there is a nameExpression (label) for this location ID */}}
{{ range $args := $augmentData.location.templateInput.locations }}
  {{ $targetLabel := $args.targetLabel | trim | lower }}
  {{ if (eq $targetLabel $locationLabel) }}
    {{ $arguments = $args }}
    {{ break }}
  {{ end

 }}
{{ end }}

{{/* If augment arguments related to this location were found, perform templating */}}
{{ if not (empty $arguments) }}
  proxy_pass http://{{ $arguments.upstreamName }};
{{ end }}
Add the location.json details
- Select location.json.
- Copy and paste the following contents into the location.json file editor.
- Select Save (disk icon).
{
  "$schema": "https://json-schema.org/draft/2020-12/schema",
  "title": "Reverse Proxy Augment",
  "type": "object",
  "properties": {
    "templateInput": {
      "type": [
        "object",
        "null"
      ],
      "properties": {
        "locations": {
          "type": "array",
          "title": "Locations",
          "description": "To configure each location, the 'Label' you enter below must exactly match a 'Label' in the base template. This ensures the system can properly inject a reverse proxy directive targeting the specified upstream.",
          "items": {
            "type": "object",
            "properties": {
              "targetLabel": {
                "title": "Target Location Label",
                "type": "string",
                "description": "Enter the label for this configuration's target location. It must exactly match the 'Location Label' from a base template location to ensure the system correctly injects the augment inputs into the configuration.",
                "examples": [
                  "Main Location"
                ]
              },
              "upstreamName": {
                "type": "string",
                "title": "Upstream Name",
                "description": "Name of the target upstream. Must match exactly.",
                "examples": [
                  "upstream_1"
                ]
              }
            },
            "required": ["targetId", "upstreamName"]
          }
        }
      },
      "required": ["locations"]
    }
  },
  "required": []
}
Generate and deploy the configuration
Lastly, generate and deploy your configuration.
-
On the left navigation pane, select Templates.
-
Find rr_base_template in the list of templates. In the Actions column, select the ellipsis (three dots), then select Preview and Generate.
-
Select the publication target:
- Select whether you’re publishing the configuration to an instance, instance group, existing saved config, or saving as a new staged config.
- Then select the specific target from the list. Or, if you’re saving as a new staged config, provide the staged config name.
- Select Next.
-
Select the augment template:
- On the Choose Augments form, select rr_aug_loc_proxy.
- Select Next.
-
Add HTTP Server(s):
- On the HTTP Servers form, select Add HTTP Servers.
- Enter a unique label for the server (for example, Round Robin Proxy). This label is displayed in the user interface and acts as a key for matching and applying augment input to the specific server.
- Enter a server name (for example, example.com).
- Add a server location:
- In the Server Locations pane, select Add Server Locations.
- Enter a unique label for the location (for example, Users Endpoint). This label is displayed in the user interface and acts as a key for matching and applying augment input to the specific location. We’ll refer to this label when we configure the augment template inputs.
- Enter a match expression. This is the prefix to match request paths by (for example, /users).
- Select Next.
-
Add HTTP Upstream(s):
In NGINX, an upstream refers to a group of servers that handle client requests. They are typically used for load balancing.
- On the HTTP Upstreams form, select Add HTTP Upstreams.
- Enter a unique label for the upstream (for example, Users Service). This label is displayed in the user interface and acts as a key for matching and applying augment input to the specific upstream.
- Enter an HTTP upstream name (for example, users_backend). We’ll refer to this upstream name when we configure the augment template inputs.
- Add an upstream server:
- In the Upstream Servers pane, select Add item.
- Enter the upstream server address (for example, 192.0.0.1)
- Enter the upstream server port (for example, 80).
- Select Next.
-
Add the rr_aug_loc_proxy inputs.
- In the Reverse Proxy Augment > Locations pane, select Add item.
- Enter the label for the target location. This is the label that you specified in step 5 when adding the HTTP server location (for example, Users Endpoint). Make sure the labels match exactly to correctly apply the augment templates.
- Enter the upstream name. This is the name you specified in step 6 (for example, users_backend). Make sure the names match exactly.
- Select Next.
-
Preview the config:
On the Preview Config page, the resulting config should look similar to the following example:
# /******************************** !! IMPORTANT !! ********************************/ # This is a Template generated configuration. Updates should done through the Template # Submissions workflow. Manual changes to this configuration can/will be overwritten. # __templateTag={"uid":"3c4f0137-058f-4275-a8e2-1a1077ae8e8c","file":"base.tmpl","name":"rr_base_template"} events { worker_connections 1024; } http { upstream users_backend { server 192.0.0.1:80; } server { server_name example.com; location /users { # <<< BEGIN DO-NOT-EDIT location augment templates >>> # __templateTag={"uid":"8c903bd1-c11f-4820-8f0b-d12418a41bad","file":"location.tmpl","name":"rr_aug_loc_proxy"} include /etc/nginx/augments/location/base_http-server1_loc1_3c4f0137_8c903bd1-c11f-4820-8f0b-d12418a41bad.conf; # <<< END DO-NOT-EDIT location augment templates >>> } } } -
If the configuration looks correct, select Publish to deploy it, or select Save if you’re targeting a staged configuration.
Verification steps
If you targeted an NGINX instance or instance group:
-
Open a secure connection to your instance(s) and log in.
-
Open the NGINX config (/etc/nginx/nginx.conf) with a text editor. The configuration file should match the config output you previewed and generated in the previous section.
-
Next, look for a new file under /etc/nginx/augments/location/ directory with a name similar to base_http-server1_loc1_[unique-id].conf, where [unique-id] is a unique identifier string. Open this file in a text editor. The contents should include the proxy_pass directive:
proxy_pass http://users_backend;
If you targeted a staged config:
-
On the left menu, select Staged Configs.
-
Choose the name of the staged configuration you saved.
-
In the file viewer, select nginx.conf. The configuration file should match the config output you previewed and generated in the previous section.
-
Then, look for a file in the /etc/nginx/augments/location/ directory with a name similar to base_http-server1_loc1_[unique-id].conf, where [unique-id] is a unique identifier string. The contents should include the proxy_pass directive:
proxy_pass http://users_backend;
References
- Understanding Config Templates
- About Augment Templates
- Manage NGINX Configs with Config Templates
- RBAC for Templates and Template Submissions